Data for all category stores can be imported into from PlentyMarkets to Magento. Import supports the following operations:
- Add/Update
- Replace
- Delete
Category import profile steps
- Locate the profile
- General Configuration
- Client Configuration
- Schedule Configuration
- Http API Configuration
- Store Configuration
- Category Configuration
- Log Configuration
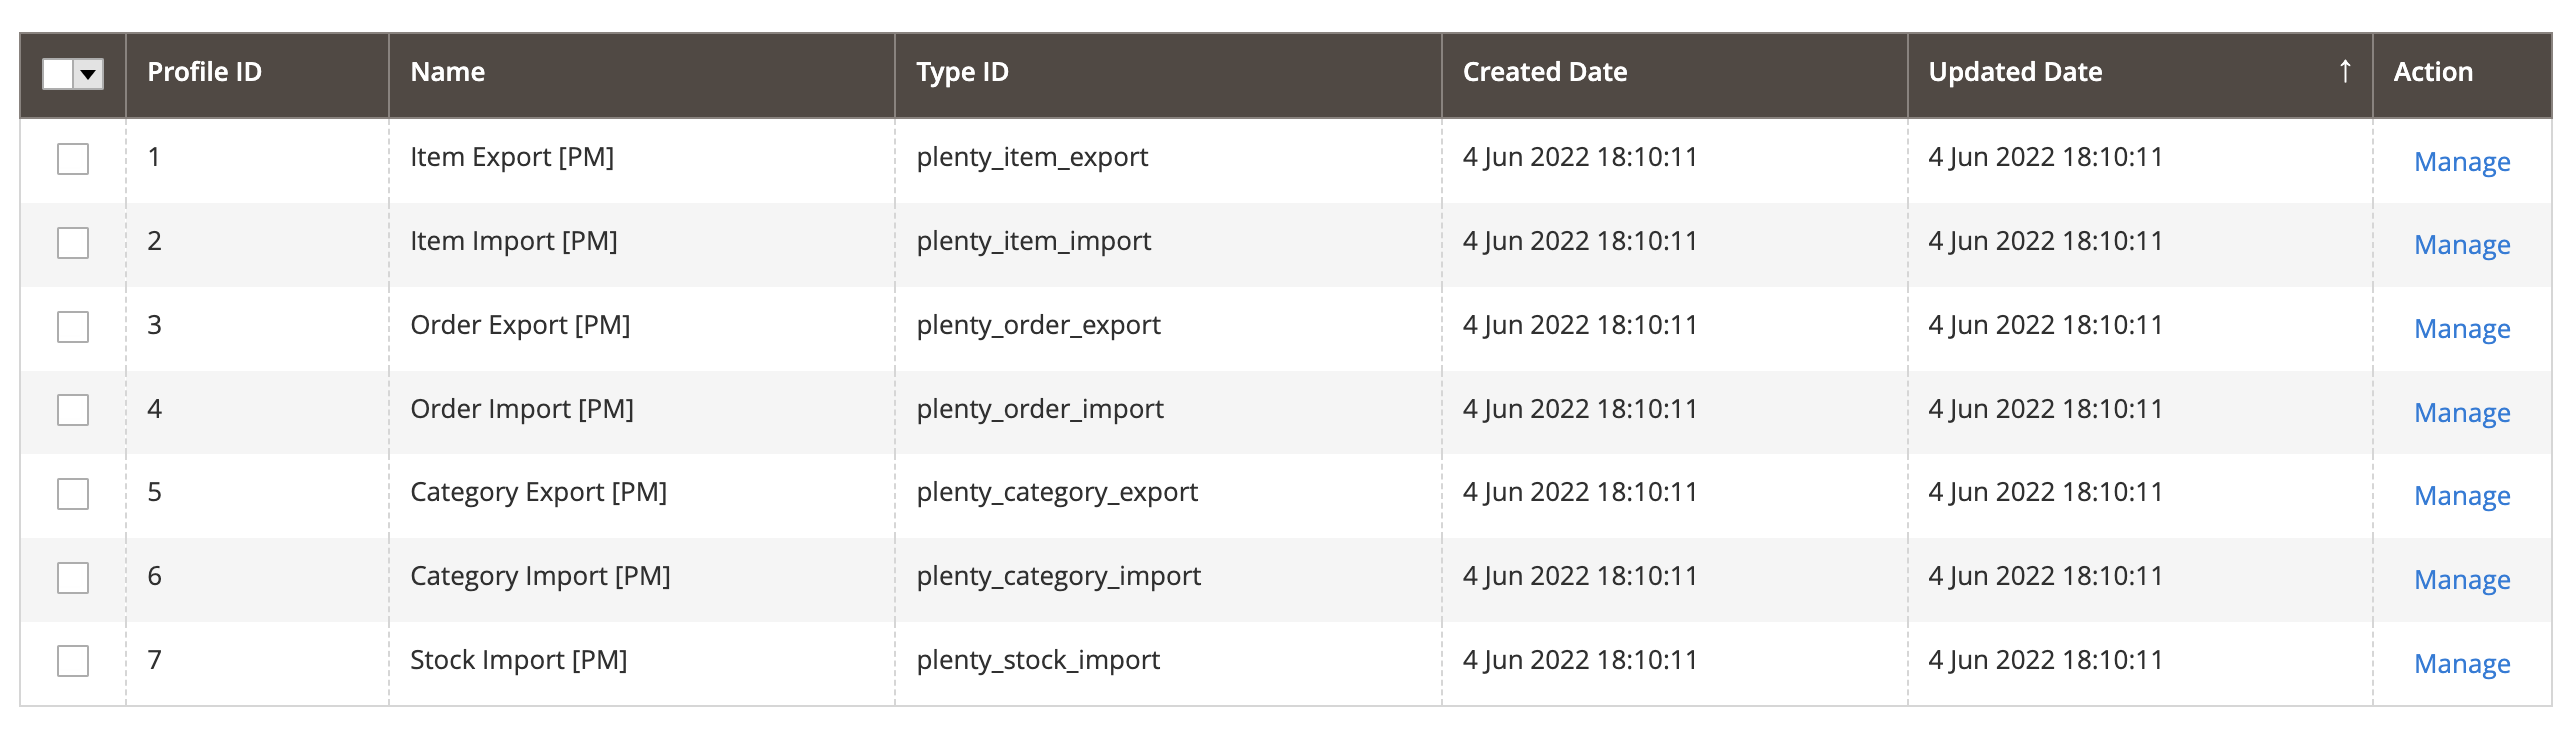
Locate the profile
- On the Admin sidebar, go to SoftCommerce > Profiles > Manage Profiles.
- From the list of profiles choose Category Import [PM].
General Configuration
- Name — Edit profile internal name. For example, Category Import.
- Profile Type - This selection cannot be edited once the profile has been created. To change profile type ID, the profile needs to be deleted and new one created.

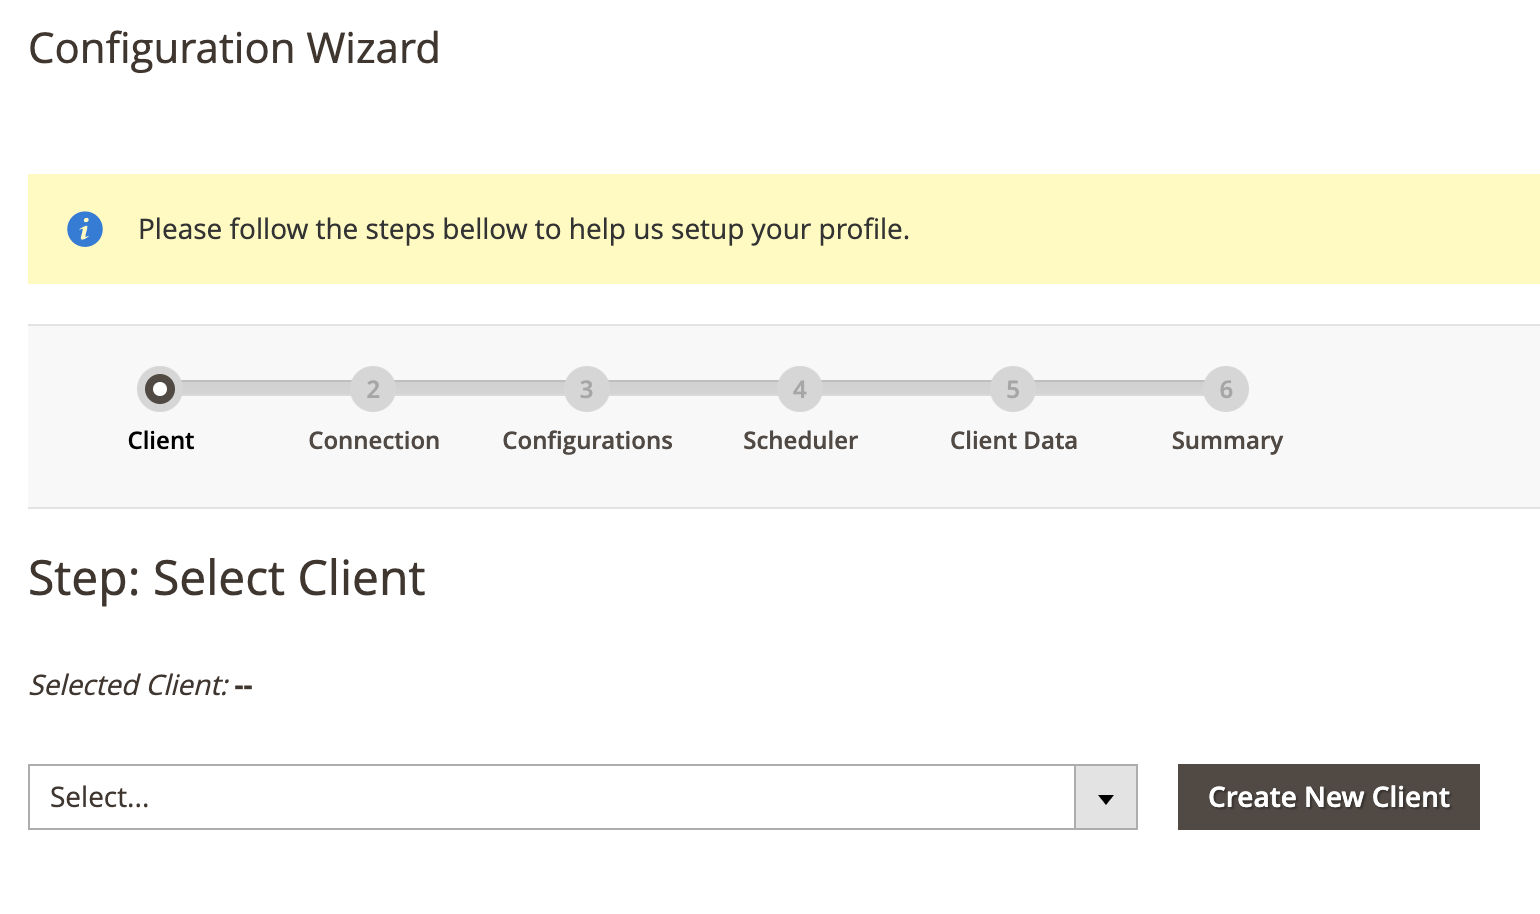
Configuration Wizard
Configuration wizard enables you to go through a number of steps in order to configure and test PlentyMarkets connection.
Click on Configuration Wizard and go through the following steps:
Step: Client
- Choose PlentyMarkets client configuration from dropdown selection.
- Or create new client connection if one doesn’t exist.
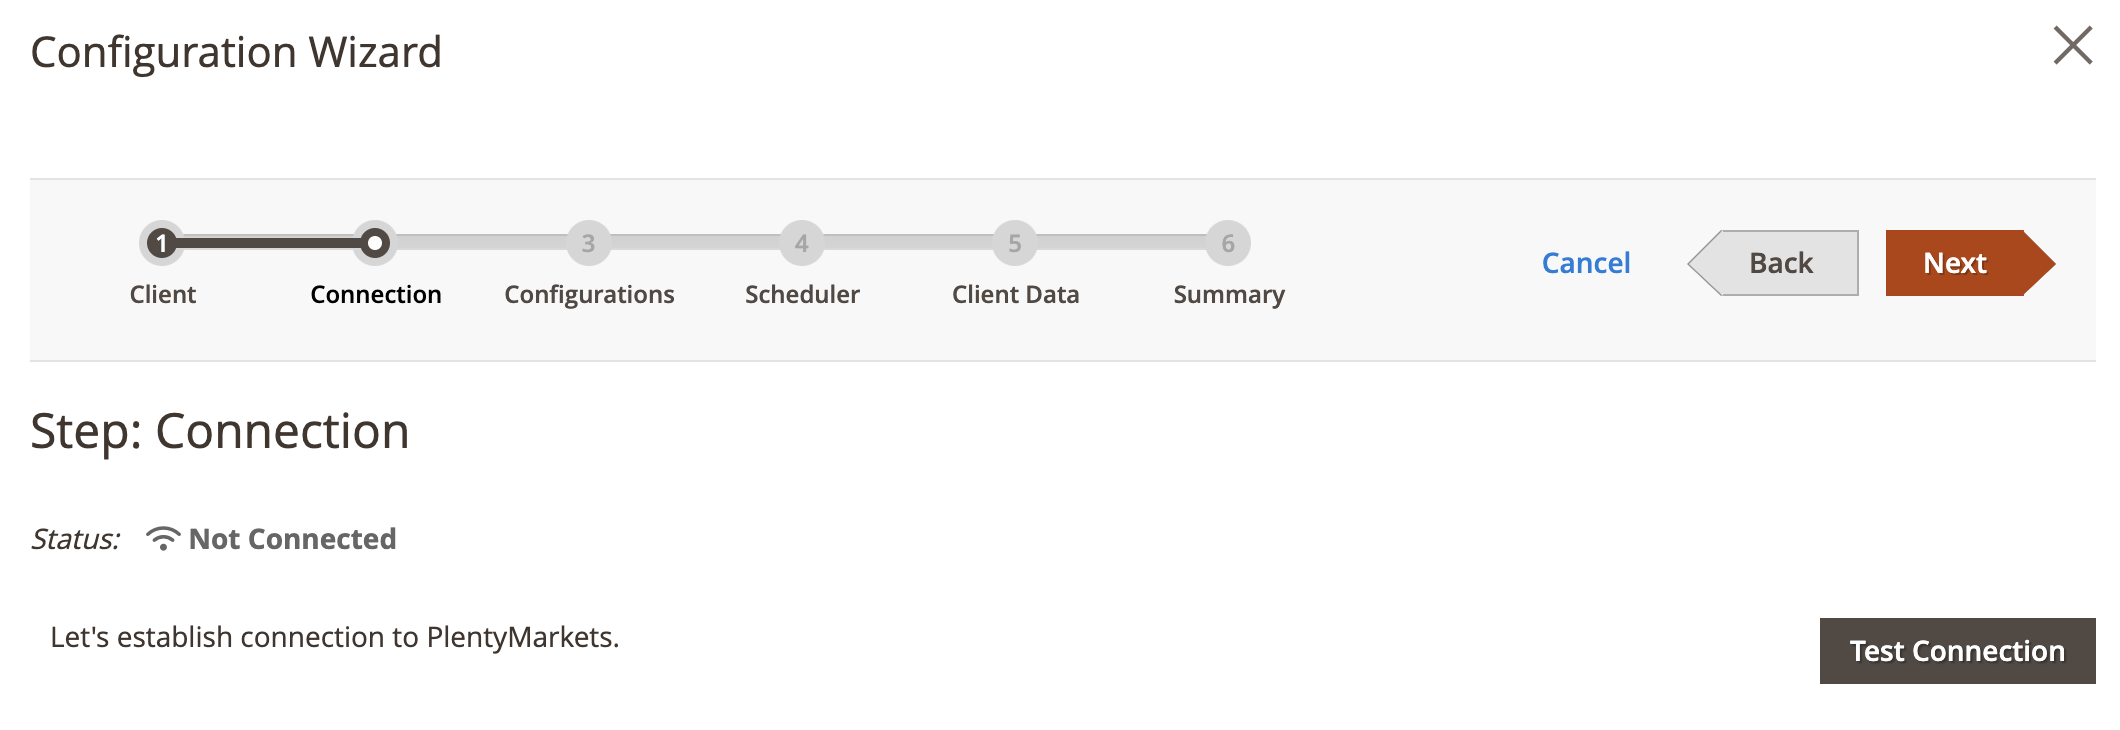
Step: Connection
- Click on Test Connection to test connection.
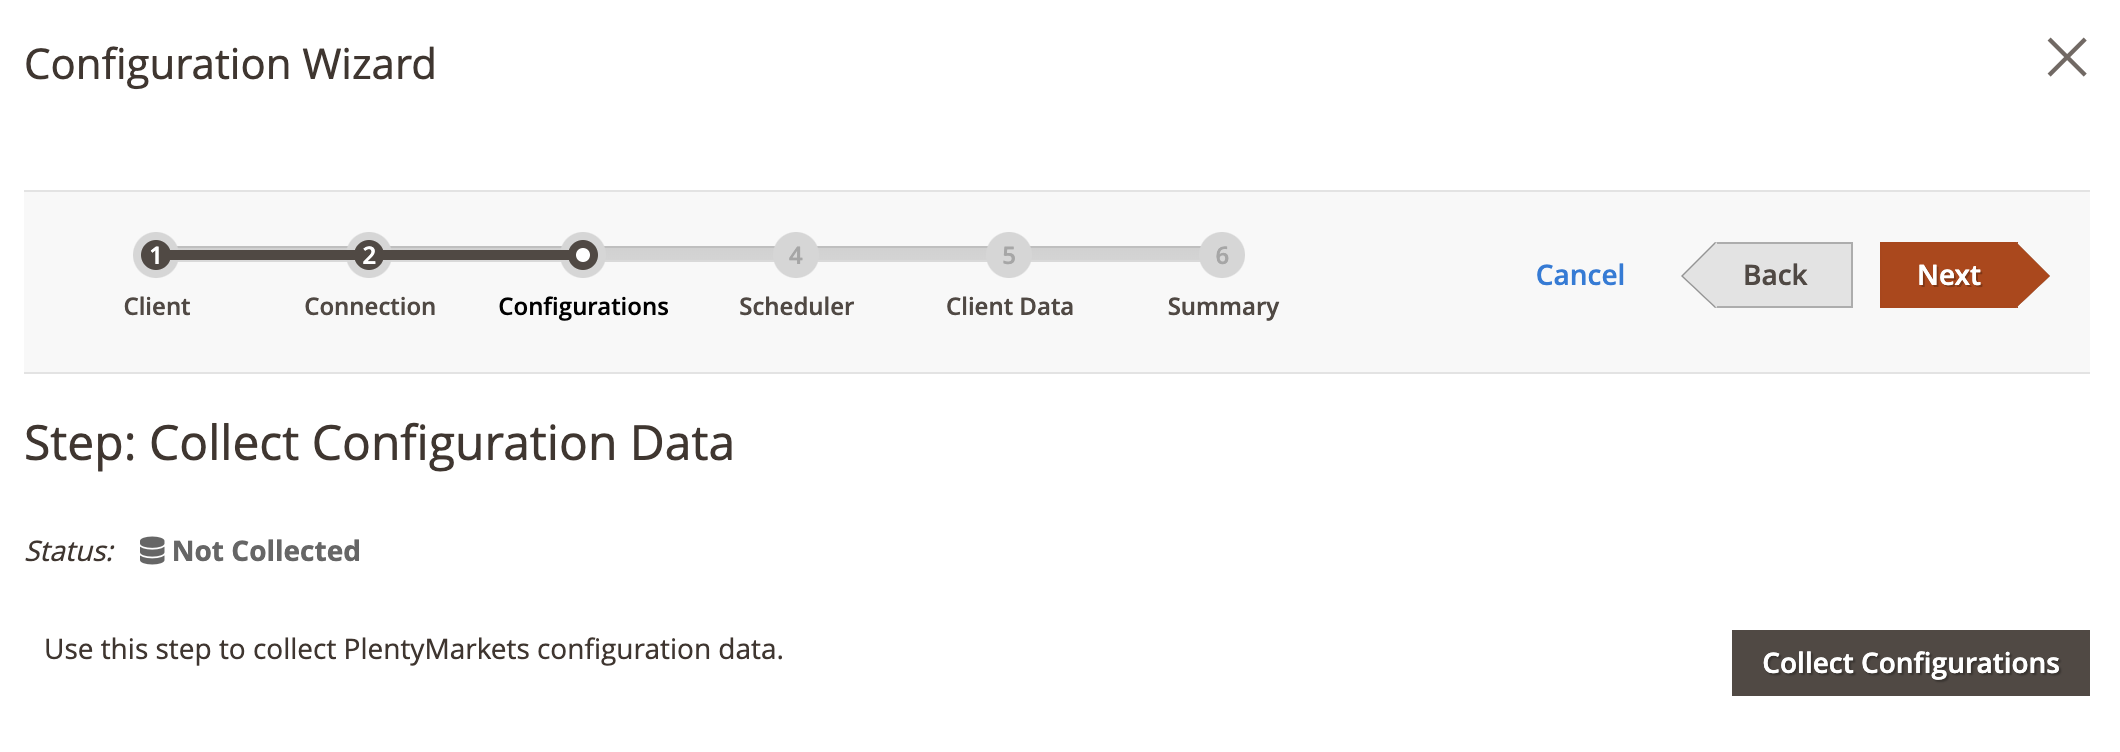
Step: Configurations
- Click on Collect Configuration to collect configuration data.
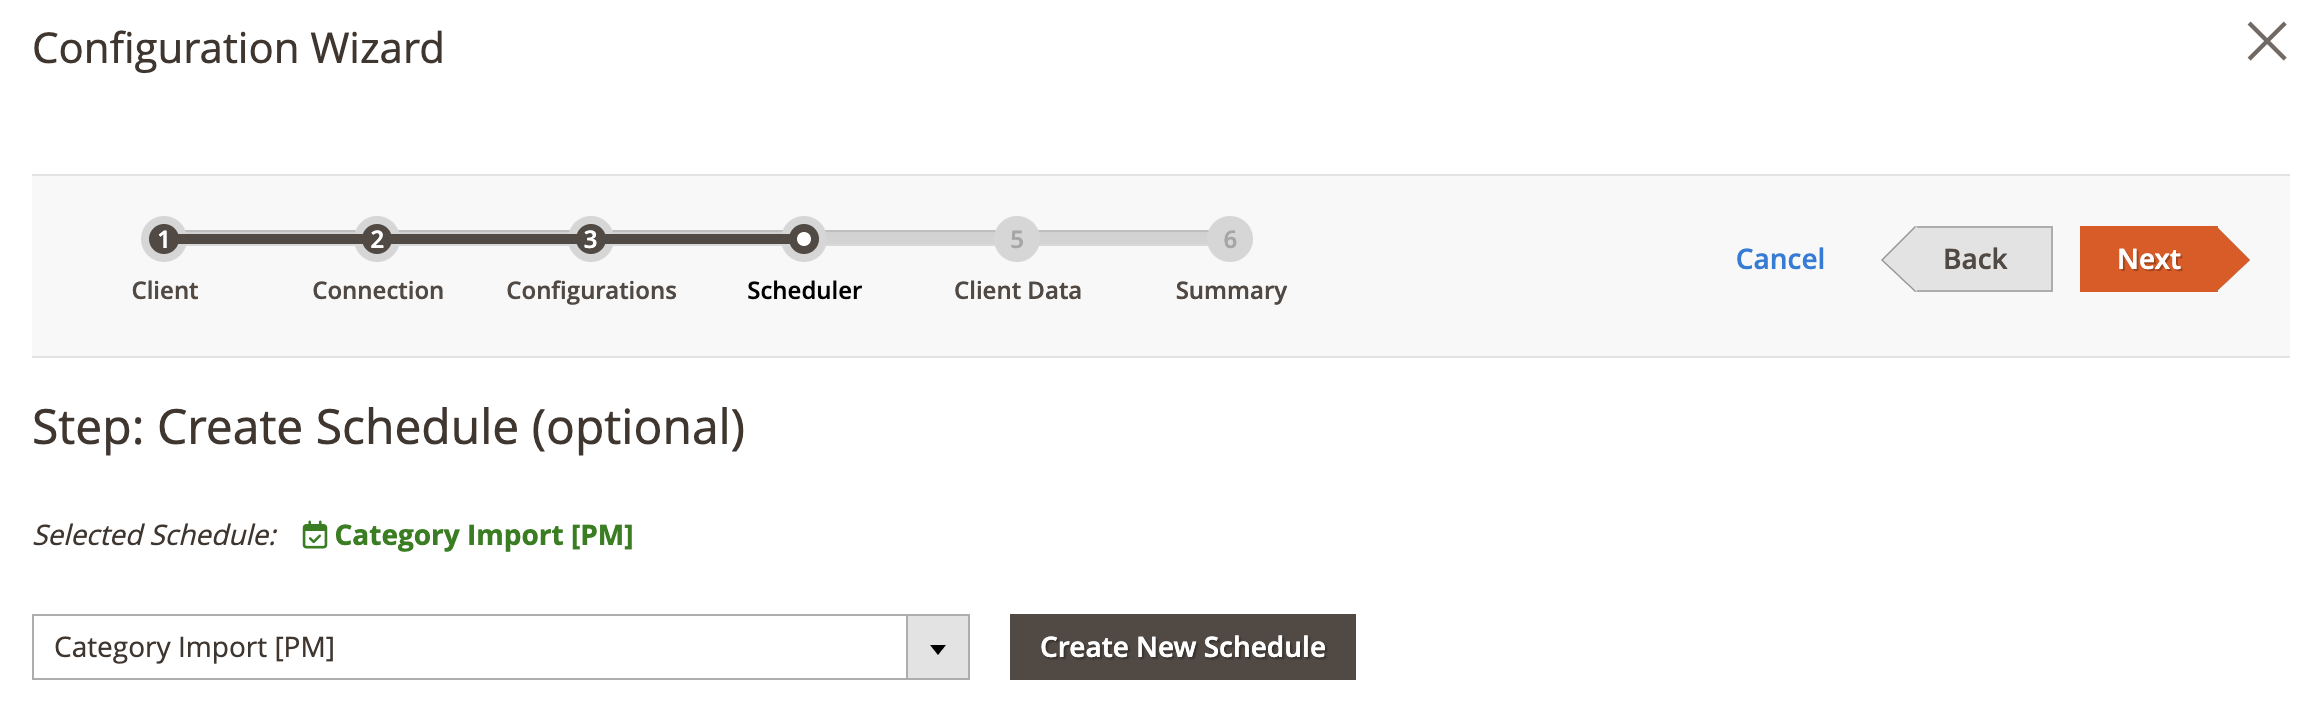
Step: Scheduler
This step is optional.
- Choose Schedule Task from dropdown selection.
- Or create new schedule task if one doesn’t exist.
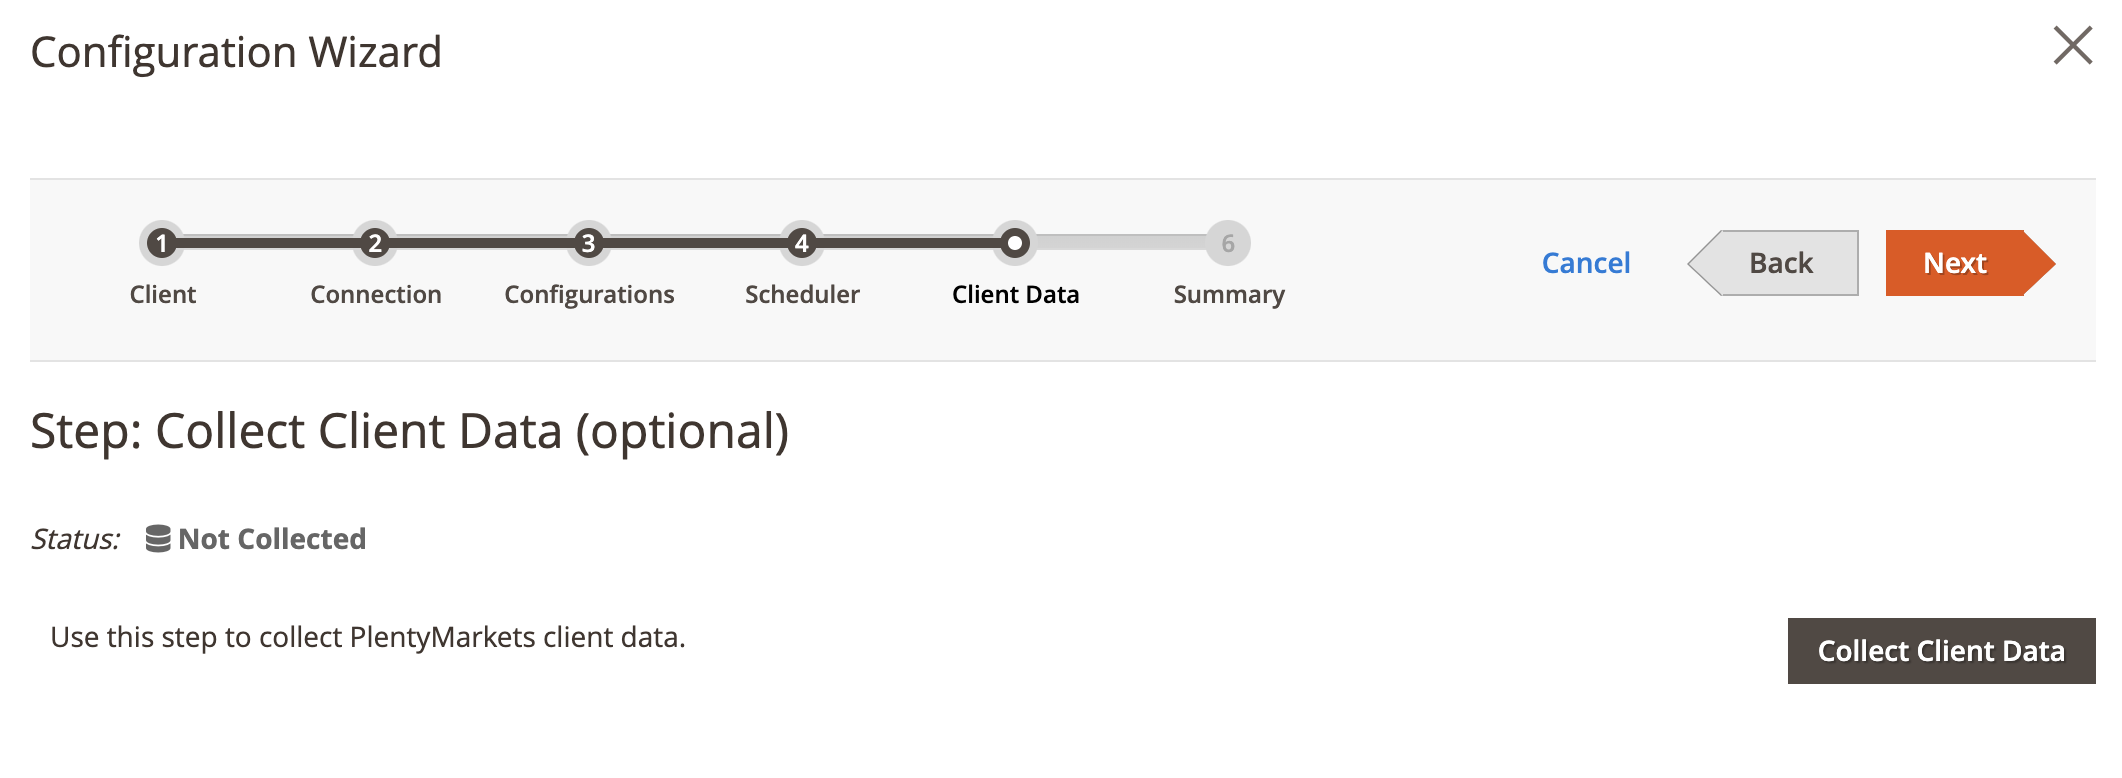
Step: Client Data
This step is optional.
- Click on Collect Client Data to collect all categories from PlentyMarkets.
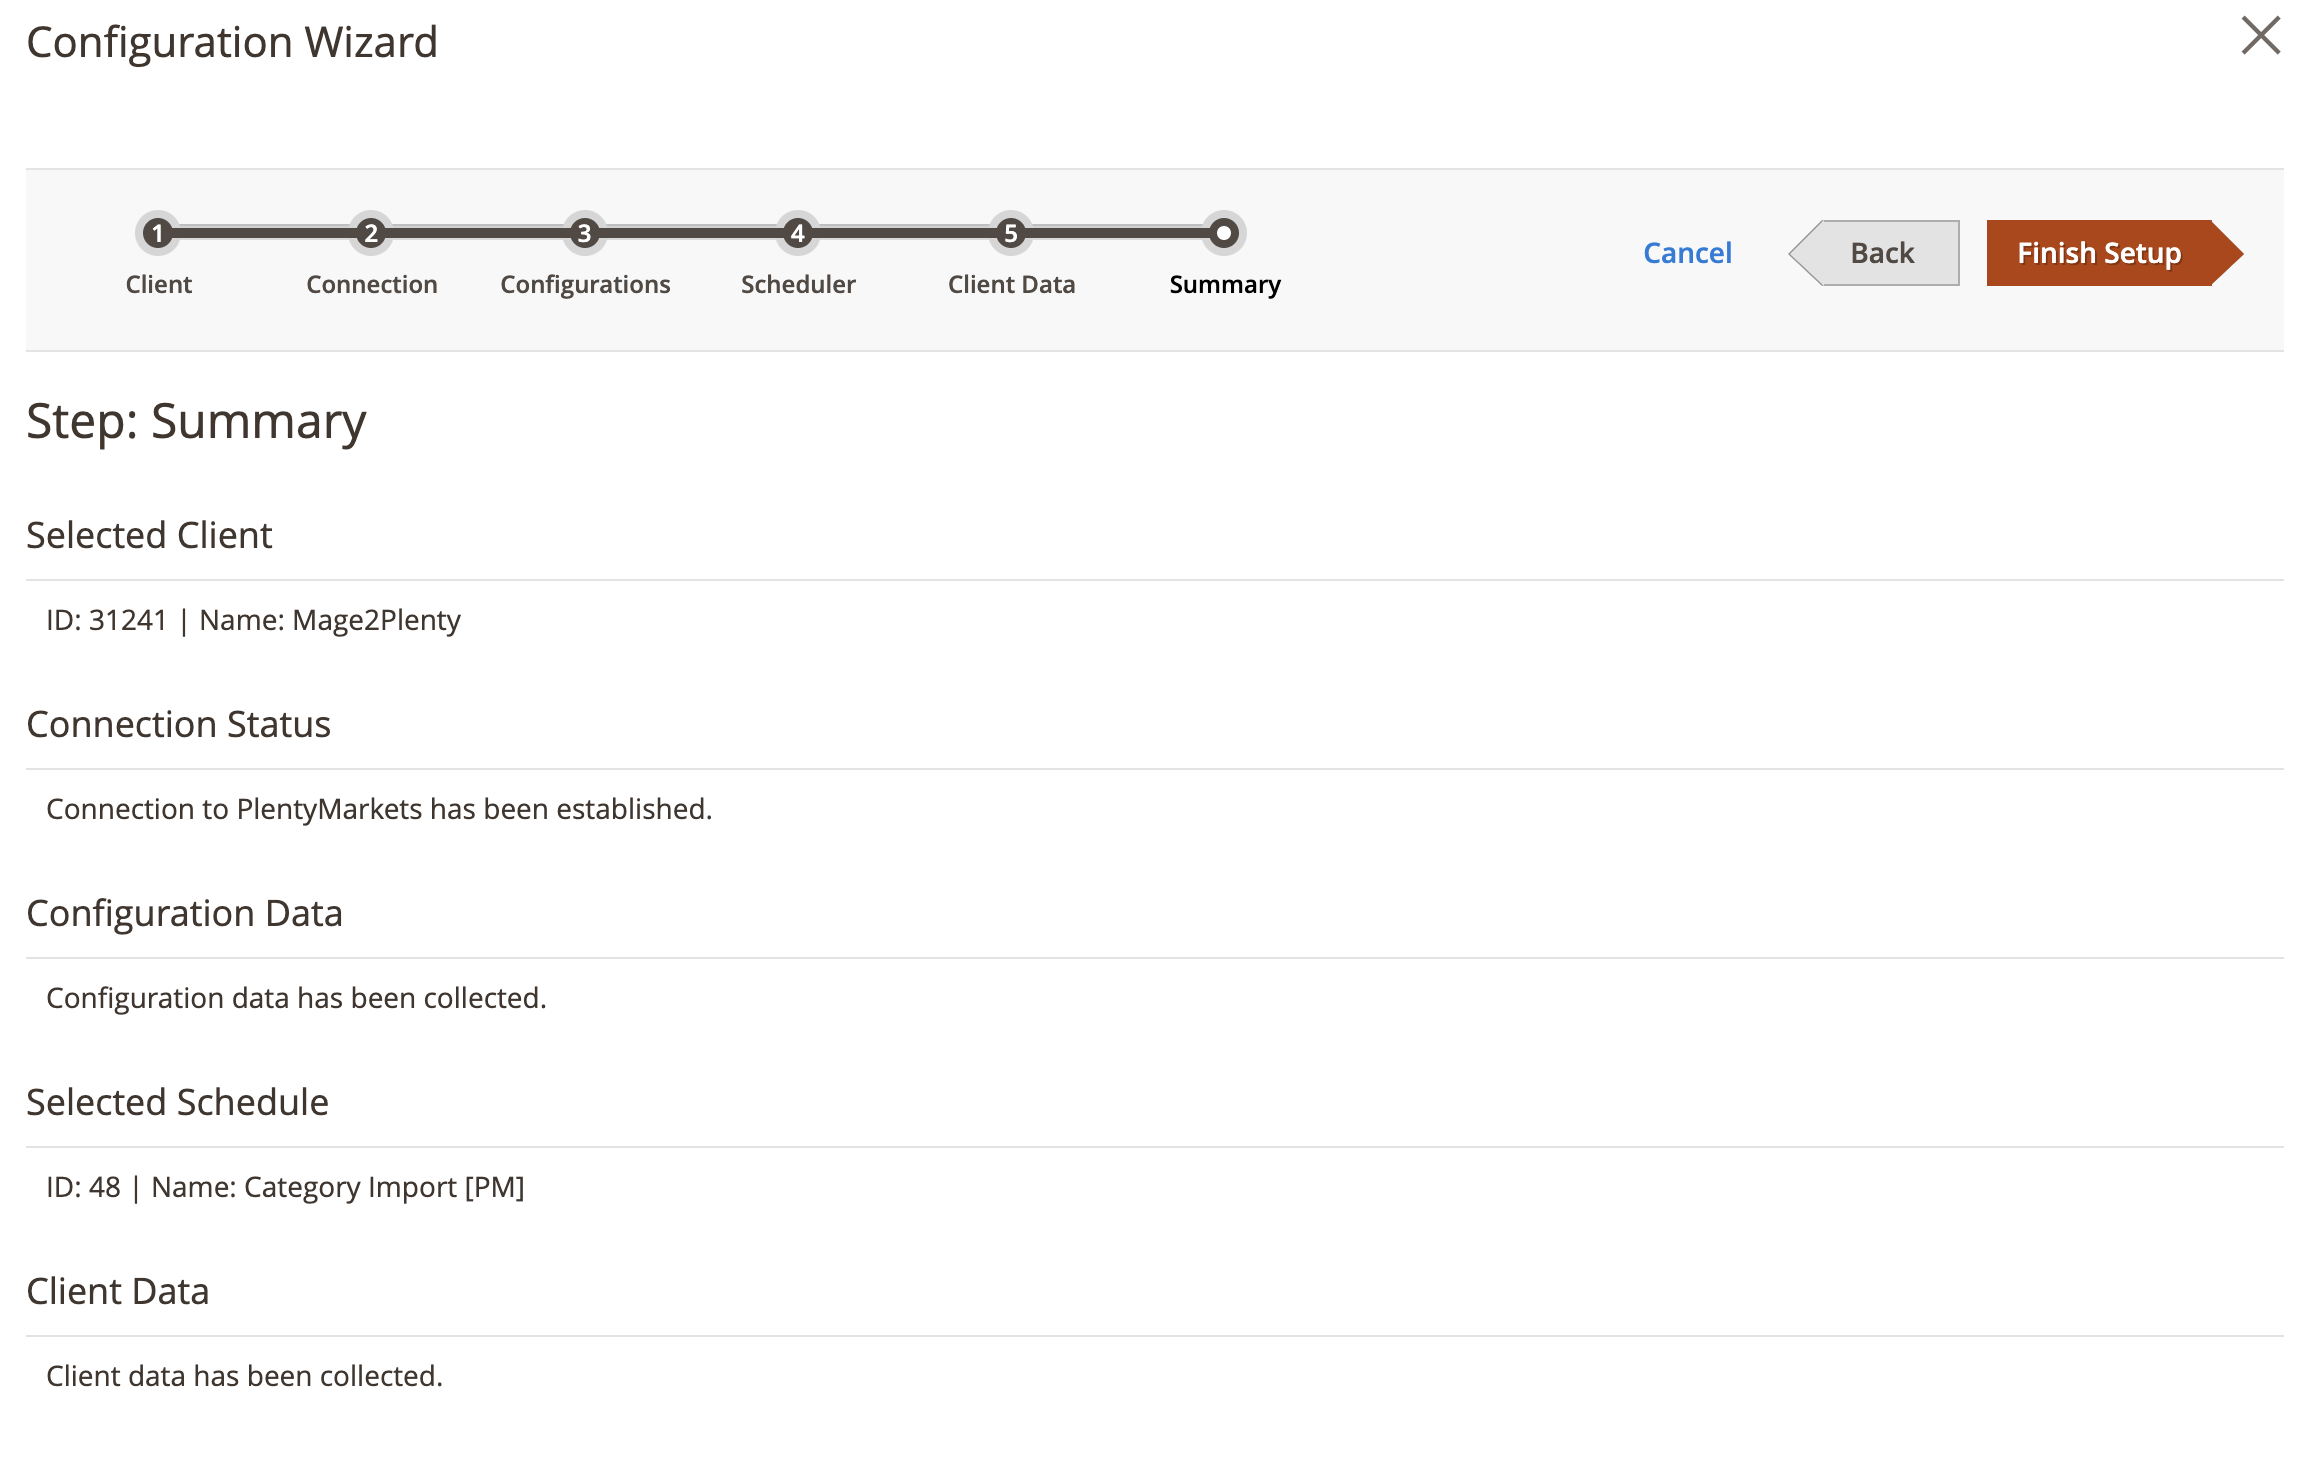
Step: Summary
- Click on Finish Setup to return to main configuration view.
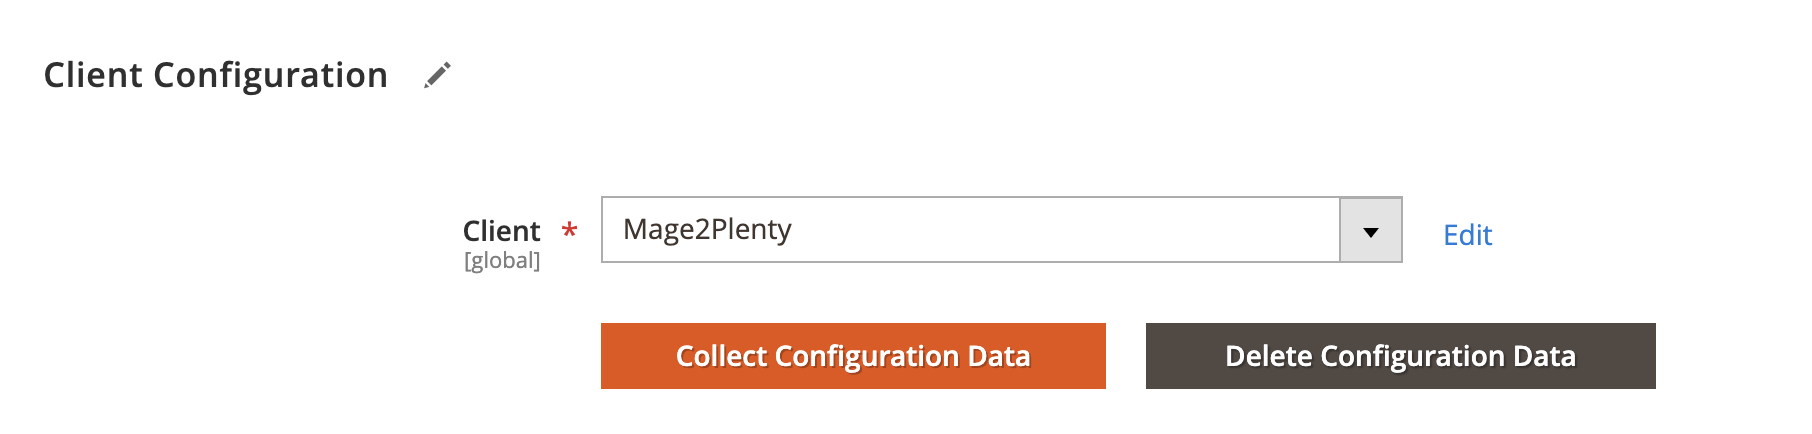
Client Configuration
You can skip this section if you've used configuration wizard to set it up.
Expand the Client Configuration section and do the following:
Setup Client Connection
- Client — Select PlentyMarkets client.
- Or click edit to manage PlentyMarkets client configuration in popup window.
Collect Client Configurations
- Collect Configuration Data - Click this button to collect client configuration data.
Delete Client Configurations
- Delete Configuration Data - Click this button to delete client configuration data.
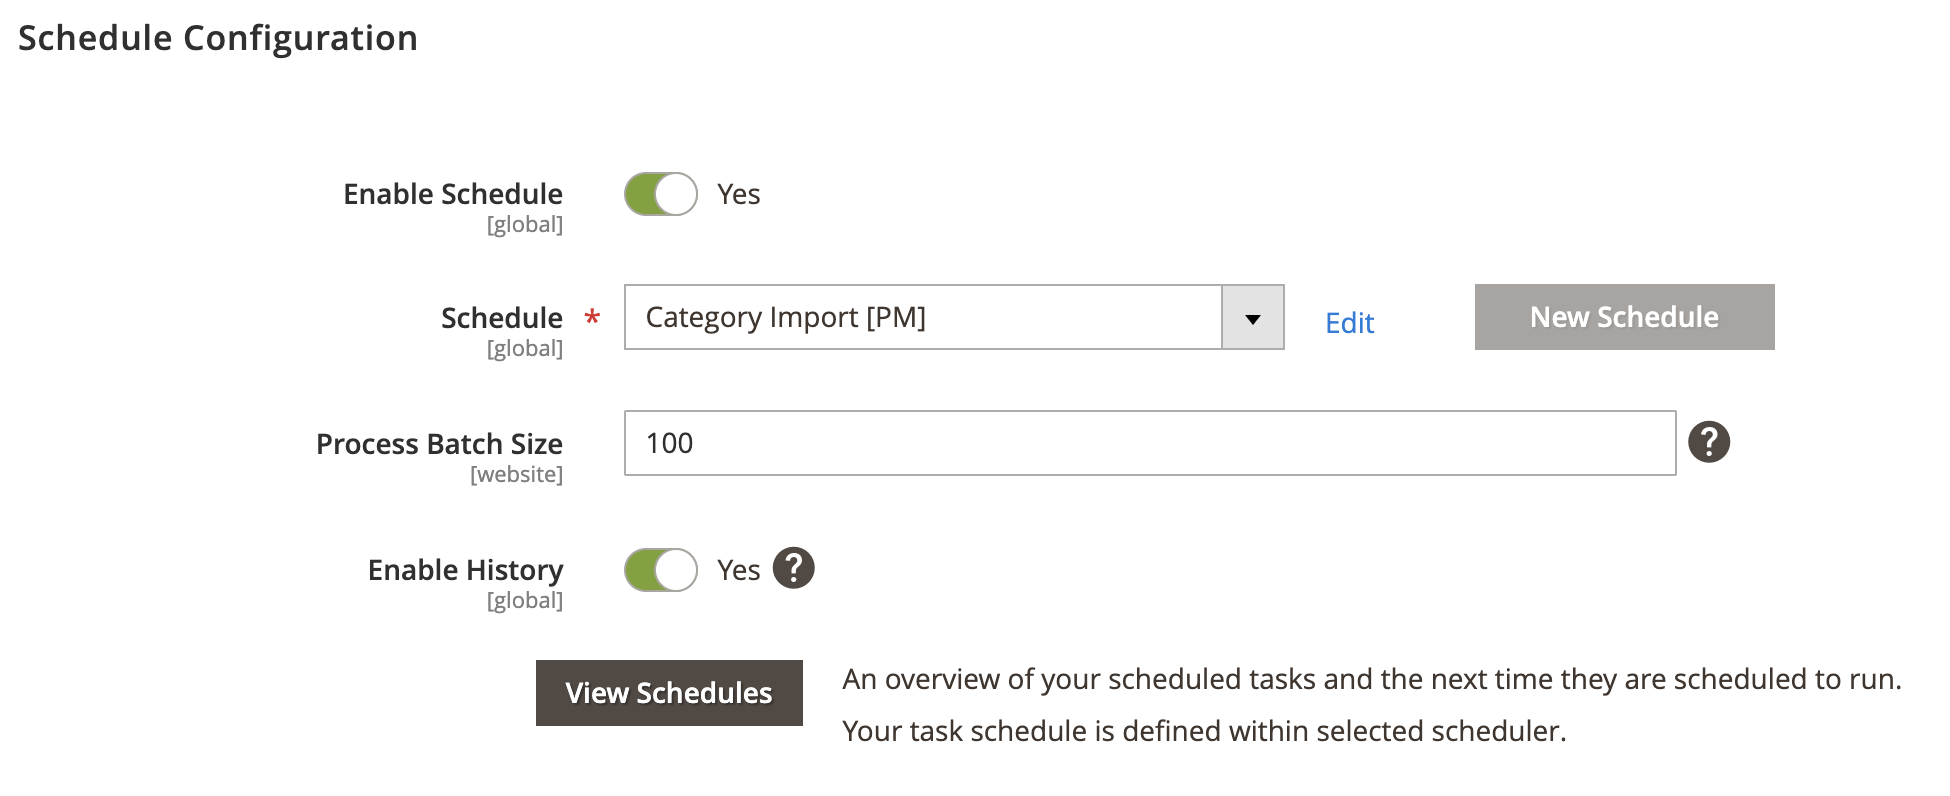
Schedule Configuration
Expand the Schedule Configuration section and do the following:
Enable Schedule
- Enable Schedule — Select Yes/No to enable / disable automatic category import using cron scheduler task.
Choose Schedule Task
- Schedule - Select, create or edit particular schedule task.
Process Batch Size
- Process Batch Size - Enter numeric value for process batch size. We recommend setting this to 100.
Process History
- Enable History - Select Yes/No to enable / disable schedule history.
- View Schedules - Click on view schedule button to view recent schedule history.
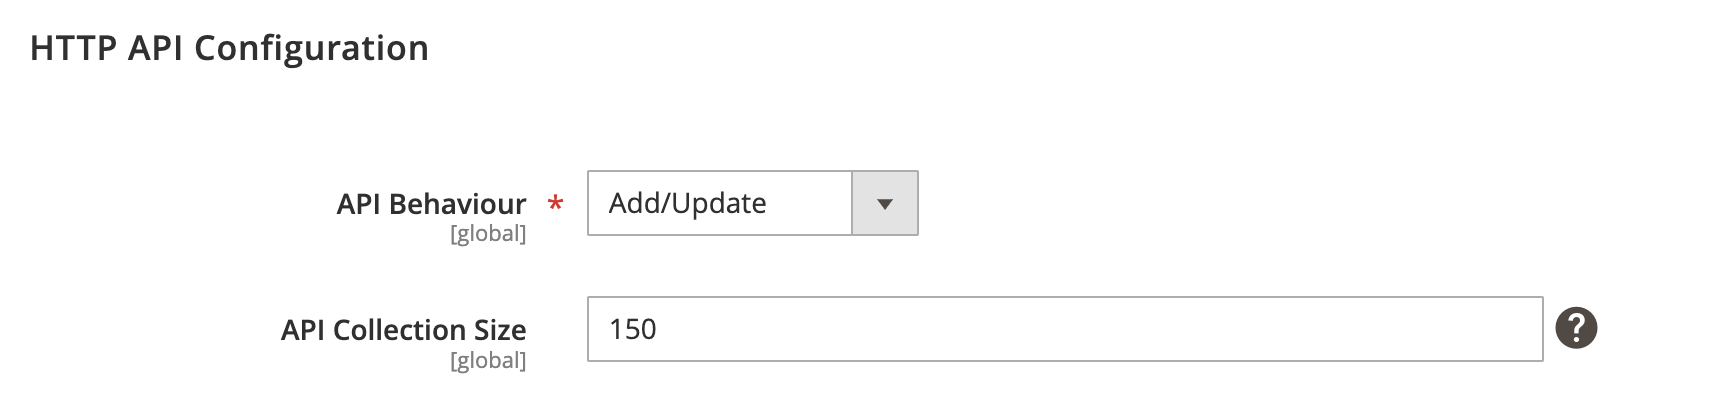
Http API Configuration
Expand the Http API Configuration section and do the following:
API Behaviour
- API Behaviour - Select Add/Append or Replace
Add/Append behaviour collects recently updated data, whereas replace behaviour collects all data.
API Collection Size
- API Collection Size - Enter numeric value for number of items returned per page by API requests. Default: 50. Max: 500.
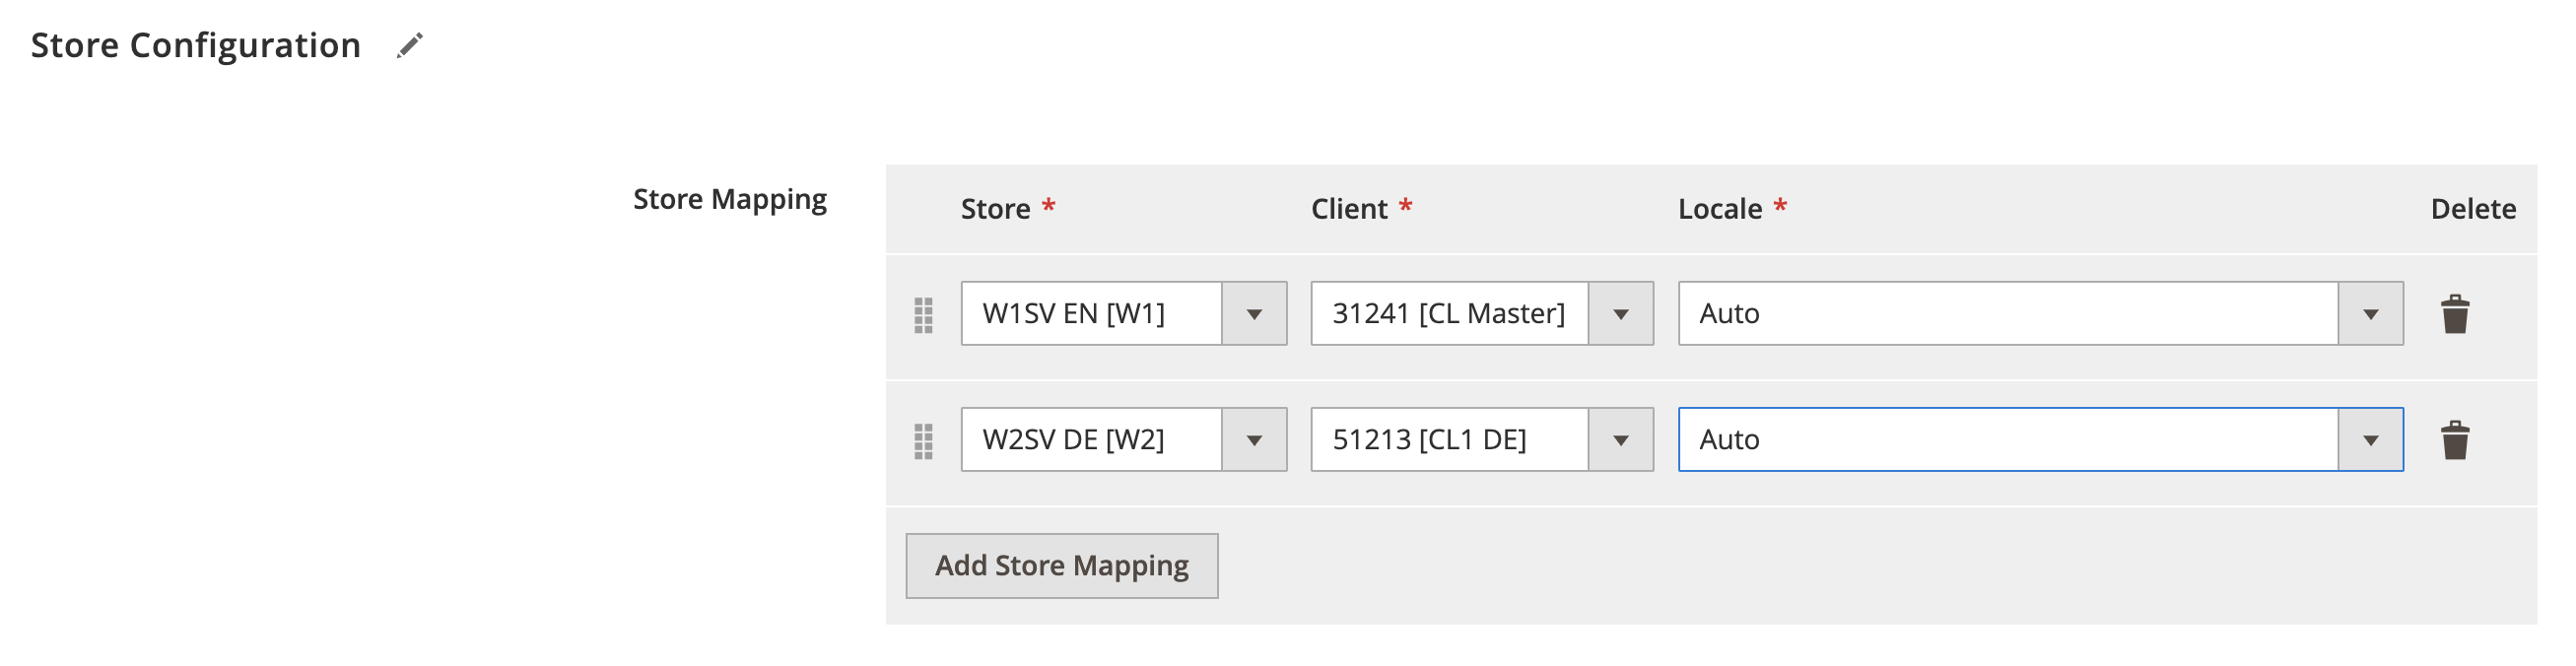
Store Configuration
Expand the Store Configuration section and do the following:
Store Mapping
- Store - Select Magento store.
- Client - Select PlentyMarkets’ client.
- Locale - Select applicable locale.
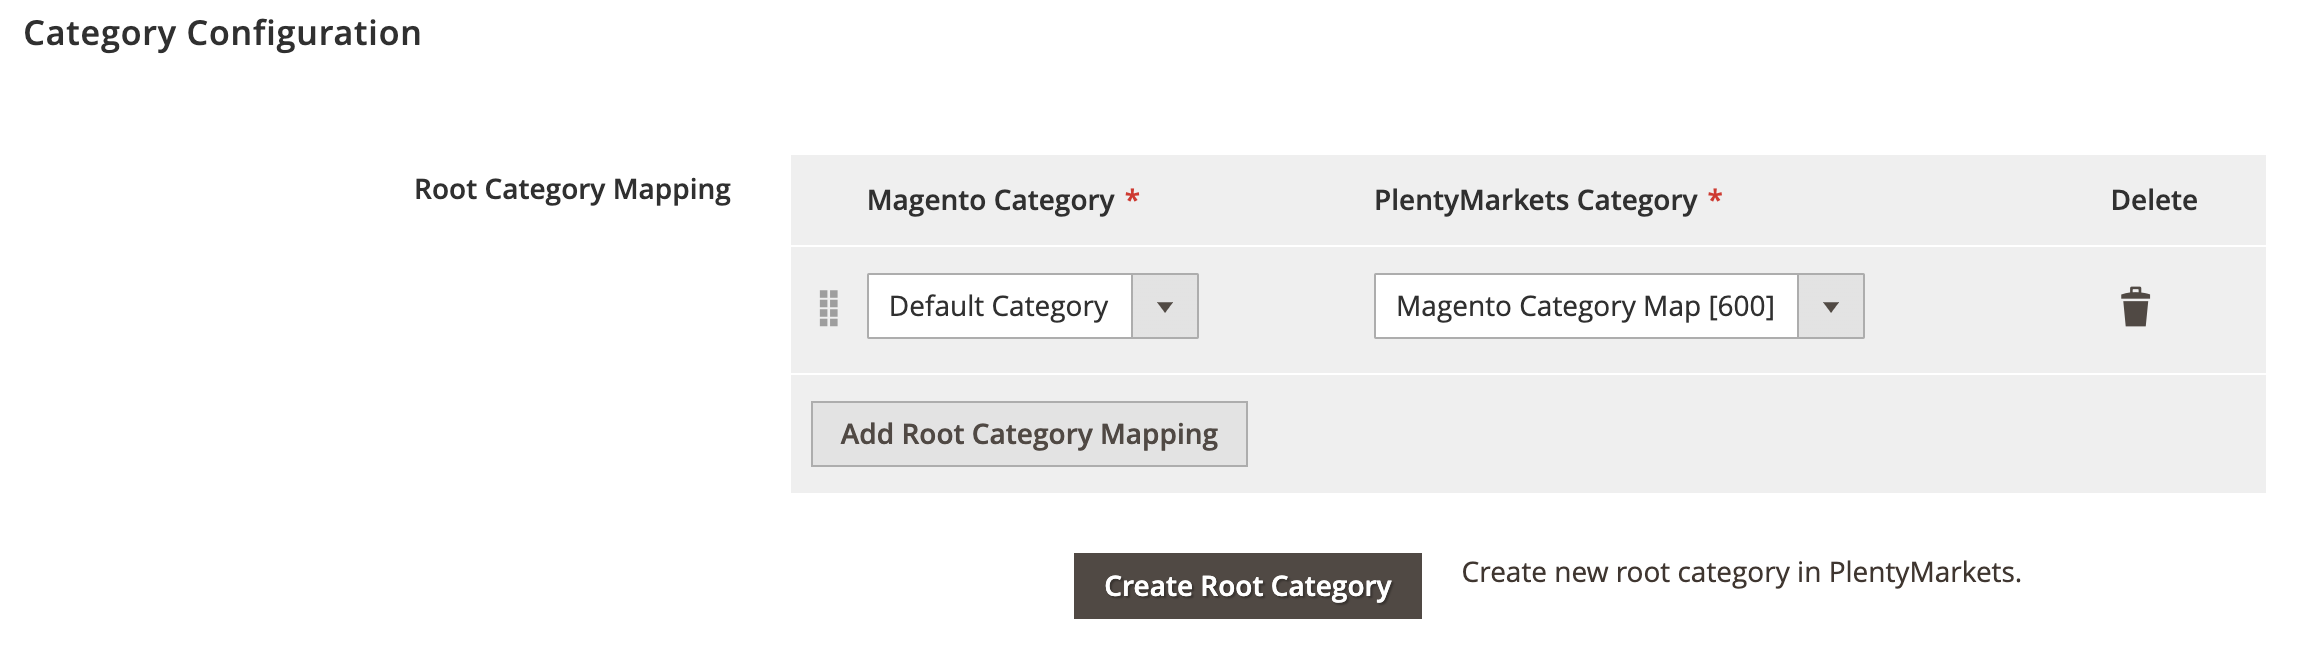
Category Configuration
Expand the Category Configuration section and do the following:
Root Category Mapping
- Magento Category - Select Magento root category.
- PlentyMarkets Category - Select PlentyMarkets root category.
Attribute Mapping
- Plenty Property - Select PlentyMarkets category property.
- Magento Attribute - Select Magento category attribute

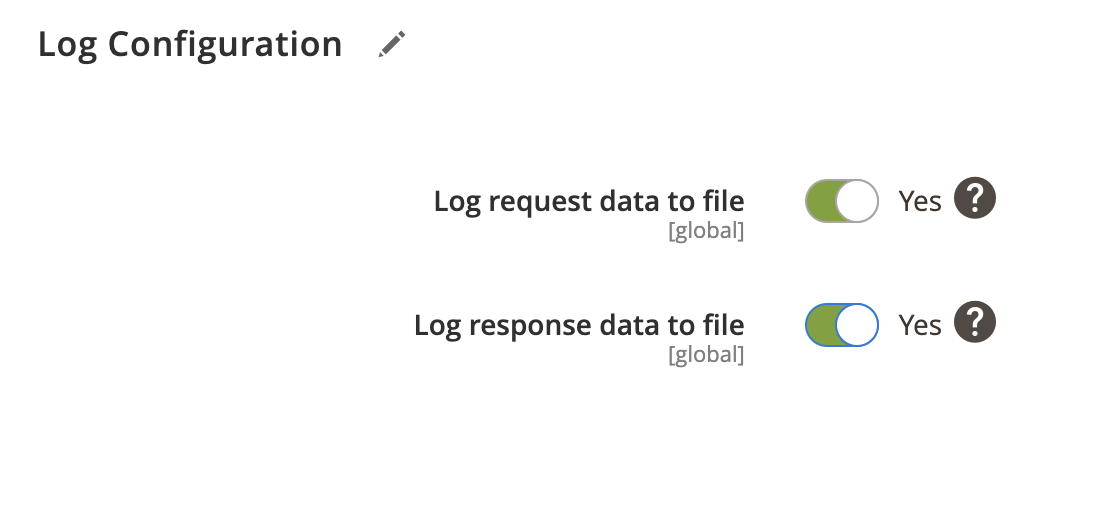
Log Configuration
Expand the Log Configuration section and do the following:
- Log request data to file - Select Yes/No to log request data.
- Log response data to file - Select Yes/No to log response data.